

Categories
A website primarily has 3 main components – Emails, Website files and Databases. So when we say migration, all these need to be moved. Each of these has its own challenges and might sound daunting. But fear not! With the Plesk migrator tool, transferring your website files, emails, and databases has never been easier. Follow these simple steps to ensure a smooth transition without any hiccups.
Step 1: Access Your Plesk Panel. First things first, log in to your Plesk Panel. Navigate to “Tools & Settings” and then to “Migration & Transfer Manager”.
Step 2: Initiate Migration Once in the Migration & Transfer Manager, click on “Start a New Migration”. This will kick off the migration process and open up a new migration page.
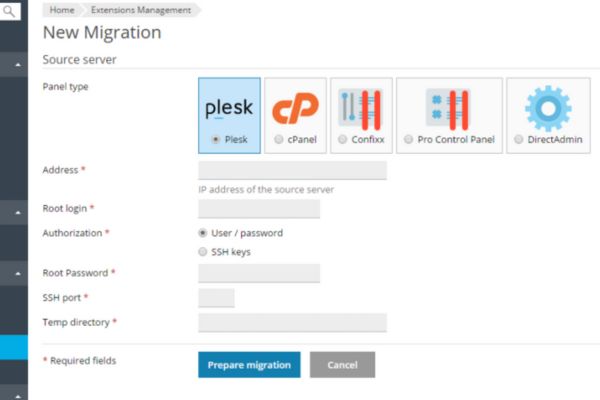
Step 3: Configure Migration Settings On the new migration page, select “cPanel” as the source server. Enter the IP Address of your source server and provide the root username and password. Click on “Prepare Migration” to allow the Plesk Migrator to gather all necessary details from your cPanel server.
Step 4: Select Migration Options Now that the Plesk Migrator has fetched the required information, it’s time to choose the migration options. Select “Migrate by Subscription” to ensure a streamlined process. Tick the subscription accounts you wish to migrate to your Plesk Panel.
Step 5: Choose Content to Transfer Tick all three options: “Migrate mail messages”, “Migrate website files”, and “Migrate database data (tables, rows, etc)”. This ensures that all crucial components are transferred seamlessly.
Step 6: Start Migration With the migration settings configured, click on the “Migrate” button to initiate the migration process. Sit back and relax as Plesk takes care of transferring your data from cPanel to Plesk.
Step 7: Monitor Migration Progress Keep an eye on the migration progress as Plesk works its magic. You’ll receive updates on the status of each subscription being migrated.
Step 8: Migration Completion Once the migration process is complete, you’ll receive confirmation that your subscriptions have been successfully migrated to your Plesk Panel.
Step 9: Finalize Migration To wrap things up, click on the “Finish Migration” button. This marks the end of the migration process and ensures that everything is in place on your Plesk Panel.
You’ve now successfully migrated from cPanel to Plesk, unlocking a world of new possibilities for your website hosting using Plesk. Enjoy the enhanced features and seamless performance that Plesk has to offer. Happy hosting!
